Showing posts with label collage. Show all posts

Friday, 15 January 2016

learn: collage with Anne L-y So

Evolution of a collage...Bear, Moose, and Warbler

"Bear, Moose, and Warbler" is a current work in progress.  In fact, none of the pieces have actually been glued down yet. So the shifting and organic progress can continue until I find a scene I want to keep.  Sometimes, I have a hard time committing to a final image so I don't adhere everything but use photographs of the scene to develop an illustration.  I store the left over pieces in a ziplock or envelope in case I decide to adhere it all later or reuse elements from the scene.

Collaging for me is a very organic process.  It changes, evolves, and changes again.  I tend to come up with ideas, move elements around, remove things, add things, and accept surprises as they come.


Stages of making "Bear, Moose, and Warbler

Step 1.  Find magazine pages that fit colour scheme.

Step 1


Step 2. Cut out some elements and hand tear pieces for collage.

Step 2


Step 3. Draw characters with fineliner and paint with Watercolour. Cut out leaving a white border.

Step 3


Step 4. Layout elements of collage. Take photograph.

Step 4


Step 5. Isolate portion of image for illustration and use photo editing in Snapseed and or Lightroom.  In this case I chose a vignetted border on Snapseed using an iPad.  I like this composition but, I am not 100% satisfied with the lighting in the trees, as there is a lot of reflection.  This sometimes happens when using glossy magazine paper.

Step 5


Step 6. Reassemble collage and photograph.  In this photograph, there is a round glow on the top which is the overhead light reflected on the paper. I tried to place just above trees on the lighter side of the branches.  The paper I used was old photographic paper so it has a natural sheen. Unlike the reflection in the last photograph, this is more appropriate to the scene and well placed.

Step 6


Step 7. Isolate the illustration and edit to achieve a desired look.  In this case I used glamour glow in Snapseed using an ipad and a controlled vignette in Lightroom using a Macbook Pro.  I prefer the outcome of this image more in terms of the reflection but might continue to play more with this image.

Step 7


Step 8.  a)Glue down to page.  Use puffy stickers for characters to let them pop out of page. b) Or reset the scene and start again. c) Store pieces until next time.

Step 8


Follow Anne L-y So online:

Website: http://annelyartandillustration.blogspot.ca/


Friday, 25 July 2014

learn: Collage with Ana Karen San

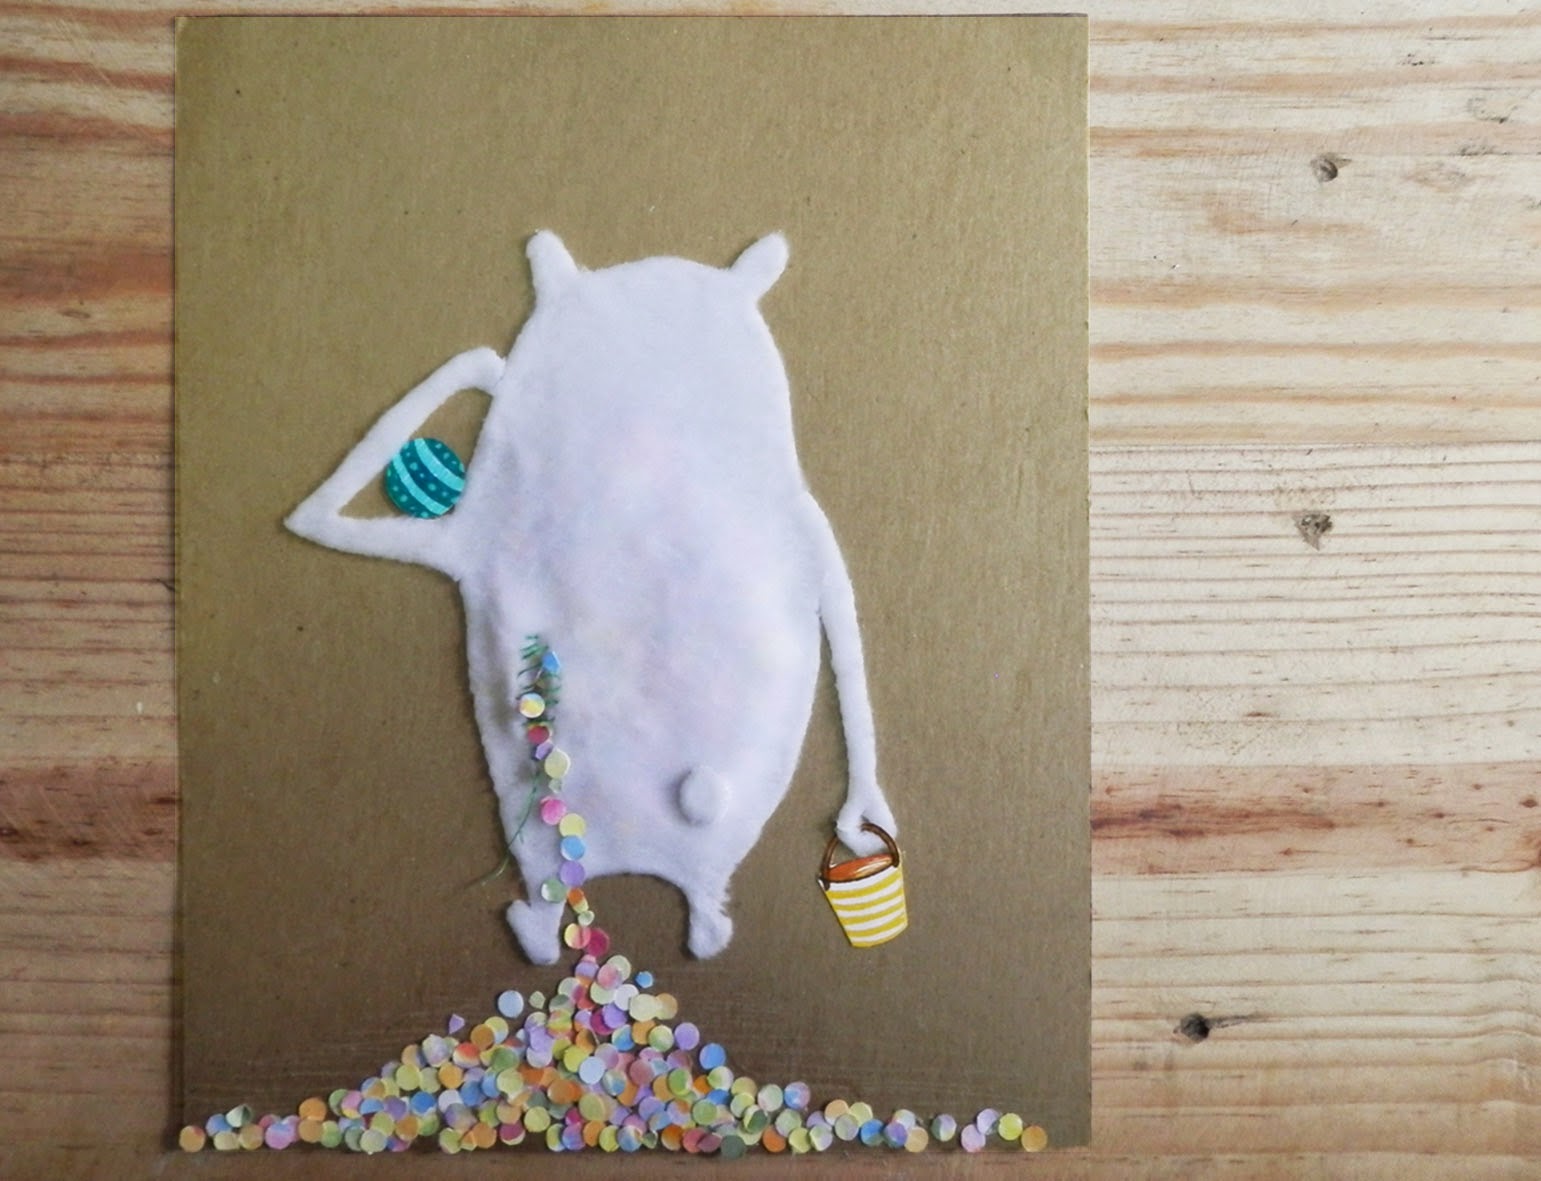
This is the collage piece I did for Week 25 – Dots.


For the sake of this tutorial, and to document each step, I have replicated the artwork (you will notice that the colours are slightly different).

After I had my final sketch I identified all of the elements on it, since I was doing a collage it was better to recognize all the parts I needed beforehand. I decided not to work on the background until the end. Firstly, I copied the character from my final sketch onto new paper in order to make a cutting guide of the two parts needed for making the character in fabric.


Then I cut a piece of fabric according to the patterns.


Having the parts of the character cut I proceeded to copy the ball and the bucket from the sketch in a white sheet of paper and applied color with some markers. After coloring them I cut them with a blade or stencil knife.


Then, for the stuffing I did my own confetti.
For this part it is important to place your piece of paper on a board and tape its sides well in order to avoid it moving or distorting. Also, it is best to use paper with a high percentage of cotton for these types of watery techniques.


For the next step I applied the watercolour with only a small amount of water because I wanted solid colours.  Before you continue further you must wait for the paper to dry.


Then I used two methods for cutting the paper. First I used a whole punch (like the one you see below) for the biggest circles, and for the small ones I folded the paper and start to cut with scissors in a circular shape (the folding was for being faster).


Then for putting it all together, I sewed the two parts of my character by the sides. Then I cut a line on one side of it for making the hole, which would be the place where all the confetti will come out and then I stuffed it with the confetti. Then with a contrasting color sewed it loosely.


Then I pasted the character onto the brown paper background, and added more confetti. I went for that paper because the character was going to play at the beach, so I needed sand.


After pasting I added the other elements (the ball and the bucket) and took a picture of it finished. (If you do collage and you like how the multiple layers stand out from each other is better to take a picture to register your piece rather than scan it as most of the time you lose the lights and shadows you achieved when scanning.


Lastly in Photoshop I applied some yellow light to the background in order to give it a sunny feeling. Then it is complete.


Crop, then it is complete.


Ana Karen San Emeterio

Friday, 11 April 2014

learn: Watercolour Collage with Nicky Johnston


This is the illustration I did for week 11 – Architecture. I have been fiddling around with some collage effects for a little while, and decided to use this technique with this illustration.

I didn’t take progress photos of this exact work, but have replicated it to show the steps I used to create it. I am by no means an expert in collage, but am happy to share my personal process.

To begin with, I drew a quick sketch of the building shapes I wanted to use.


Using my light box, I lightly drew an outline for the background which I painted in watercolour. Using a very wet brush, I mixed the colours I wanted to use. I began at the top and painted the shape, adding lots of water and paint to allow it to seep.

Working very quickly (so the paper doesn’t begin to dry) I changed colours, painting the bottom (keeping it very wet, as well) then blended the two colours to create the horizon. I allowed this to dry completely before doing anything with it.

I usually do a few background blocks because I am impatient and sometimes never sure which one I will actually use!

(Below is one I didn’t use, but is still shows the effect.)


Next, I traced over each of the building shapes, cutting them out and using a fine liner to give them an outline.

I have had my light box for decades (I saved it from the tip, from a printing business that was closing down) but you could easily use a window and natural daylight to get the same effect.


Once the buildings were stuck, I cut the card, leaving a 1 - 2mm white edge around the buildings.

I used the colour tones from the sky to add shading to the buildings to give a 3D effect, painting darker the buildings that are behind the front ones.

I then attached to the watercolour background using padded double-sided tape. You could simply glue it to the watercolour background but I wanted to enhance the 3D effect by having the buildings appear slightly above the background.

I did the same process with the balloons, although I painted directly onto the card, so the red colour would really stand out! I made the balloons appear to float by simply making them bigger the further out of the city they flew.

I have had a lot of fun with this collage and I have now even created my own ‘text newspaper’ documents to print as I require for any future projects.


See more on Nicky's fabulous work and books at www.nickyjohnston.com.au.